The 3 Most Important Mobility Drills You Aren't Doing
With just 3 simple moves, you can improve the stability of your core and increase mobility.
"Mobility" is a big buzzword these days. People looking to limber up and feel better are offered countless exercises designed to improve this mysterious quality—more exercises than any of us could be expected to remember or perform consistently.
I almost always integrate three simple drills that pay off in large and surprising ways. I can almost guarantee that you've done two of them at some point, but it's high time you revisit them with new eyes.
Sometimes, Stability Is The Best Mobility Builder
Have you heard the saying, "You can't fire a canon from a canoe?" It might sound strange, but it's one of my favorite analogies to use when talking about mobility.
Think about it: How far would a cannonball travel if you shot it from a cannon sitting in a canoe? Not very far at all. A canoe in the water is not a stable surface, so it would be forced backward by the power of the blast. Now, what if that same canon was fired from solid ground? You can bet that the cannonball would travel a much greater distance.
Where am I going with this? It's simple; this is how I want you to think of your body. You core is your pillar, and it needs to be stable in order for your extremities to move freely. If it's not stable, the range of movement of your joints will suffer, and your cannonball—or barbell, or kettlebell—won't launch to its full potential.
All three of these moves include a core-activation or stability component. They're also straightforward and simple to perform—note, I didn't say easy—and can be done on a daily basis to help improve your mobility by focusing on the strength and stability of your core. Maybe incorporate them in your warm-up, and see how your subsequent improves!
1. Plank And Side Plank
Ah, planks! Everyone's most-loved exercise, right? Well, if not, it should be. Planks and side planks are two of the best exercises for both hip mobility.

That may sound surprising. Hips and planks? Hear me out. Your hips should move fairly easily within the socket: flexing, extending, and rotating both internally and externally. All these movements influence how well you walk, run, squat, lunge, deadlift, bench, and jump. But if your core is not stable enough, other muscles have to work in order to maintain some semblance of stability.
The problem with this is that these muscles aren't meant to do this job. This is the definition of "compensation," and in this case, the compensation causes a change in how the hip bone can move within the socket, causing a decrease in mobility and potential pain and injury.
This is where planks come to the rescue! By activating the core muscles, planks essentially reset the hip and allow the joint to move freely again.
Include both regular planks and side planks in your routine; they both play an important role in improving an aspect of hip mobility. If you can meet the testing standard with one, focus more on the other for a while.
Push-Up-Position Plank Technique And Standards
- Place your hands directly underneath your shoulders. They can be positioned in line with your shoulders or slightly wider than shoulder-width apart.
- Keeping your back flat and your toes planted, squeeze your glutes, and assume the top position of a push-up. Make sure your head and spine remain neutral.
- Hold this position for 30 seconds or longer. Your goal is to be able to fairly easily hold it for 2 minutes.
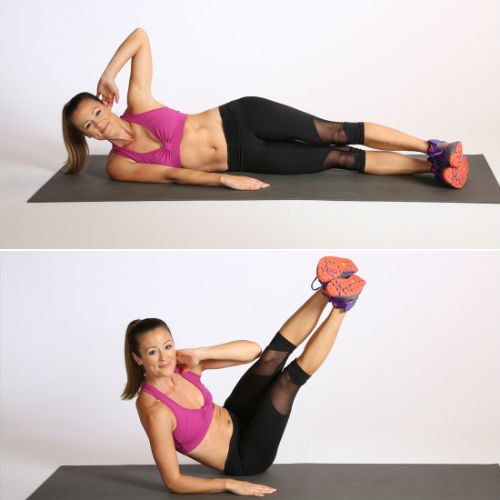
Side-Plank Technique And Standards
- Lie on one side with your top leg staggered in front of your bottom leg and your upper-body propped up by one elbow.
- Reach your other hand up toward the ceiling.
- Lift your hips off the ground so the only points of contact are your elbow and feet.
- Gaze at your upward-reaching hand. Hold the position for 20 seconds on one side, then switch sides and repeat. You goal should be to be able to hold the side plank for 75 seconds per side.
2. Bear Crawl
The bear crawl is quite possibly my favorite exercise. I know that's a bold statement, but this is an exercise I use with all types of clients. Someone who can barely walk due to intense back pain, someone who is impressively fit, and most everyone in between can all see some benefit from it.
The reason this exercise is so fantastic is twofold: First, it activates the core muscles, and secondly, it does so in a dynamic movement, as opposed to the static hold of the plank. Crawling requires the spine to be mobile and to have multiple moving parts. It is also a reciprocal movement pattern, or a pattern that our brain recognizes because we do it much of the day when we walk, run, or step.
Because of these reasons, the bear crawl encourages both mobility and stability. I cannot tell you how many of my clients suddenly notice improvement in a wide range of movements after I have them perform this exercise regularly for just a few weeks. Not convinced? Try it out for yourself!
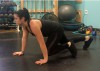
Bear Crawl Technique And Standards
- Start on your hands and knees, and lift your knees no more than an inch off of the ground.
- Keeping your knees this close to the ground throughout the entire movement, move your opposite hand and leg forward and continue walking forward in this way. Your hips should be stable, and your steps relatively small.
- Turn around and crawl back the way you came. Aim for a couple of sets of about 20 yards each. And don't worry, I realize this exercise definitely falls into the category of "harder than it looks!"
3. Thoracic Spine 90-90
This exercise is a bit different than the others; it's more what you might associate with the term "mobility exercise." That said, it still has an important core-activation component that will make a big difference in both the execution of and results from the exercise.
The reason I love this exercise and include it in my top three is because one of the most significant and consistent mobility limitations I see in my clients is in the thoracic or upper back. This tends to be a product of our lifestyles; we're constantly working at desks, on laptops, lounged in chairs or cars, or scrolling on our iPads or smartphones.
Our shoulders are forward, upper backs rounded, and over time, we get locked more rigidly into this position. Enter the 90-90, an exercise that focuses on stabilizing your hips and lumbar spine while encouraging movement to happen at your upper back.
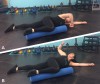
90-90 Technique And Standards
- Lie on your side with your top hip bent at 90 degrees and your knee resting on a foam roller.
- Actively push your knee into the foam roller and maintain this throughout the entire movement. This will engage your core and ensure your lower back remains stable throughout the movement.
- Try to rotate so that your upper shoulder is near to or touching the ground. You may not be able to reach it at first, but over time, you'll get there as your mobility builds. Perform 8-10 reps per side, and note any differences in side flexibility.
Source: http://www.bodybuilding.com/